How to Make Sourdough Bread without a Dutch Oven Step by Step Guide
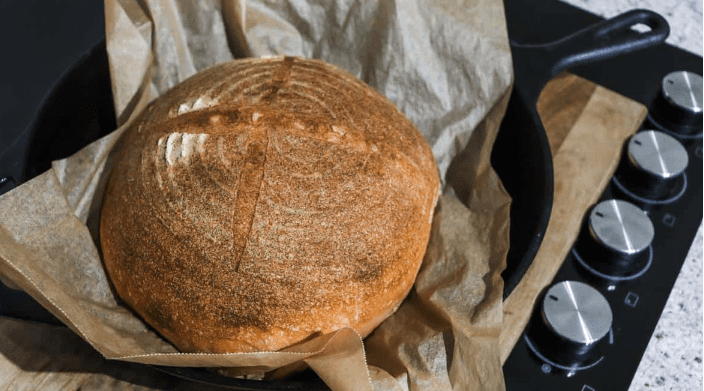
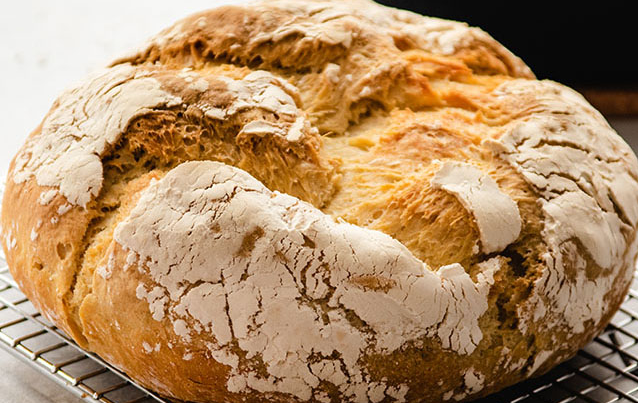
Sourdough bread is a classic in itself, known more for its tangy flavor and chewy texture, along with its crisp crust. Most recipes bake sourdough bread in a Dutch oven, but you can very easily make a delicious, rustic loaf without one. In the following article, I am going to teach you the art of baking sourdough bread with alternative baking methods that will produce the signature crust and tender crumb.
Whether you are a beginner at baking or a seasoned expert looking to get creative with the new methods, this article will guide you through everything you need to learn to bake sourdough bread with no special equipment.
Why Is Sourdough Bread Special?
Sourdough bread is manufactured through wild yeast and bacteria from a sourdough starter by the natural fermentation process. This starter acts as a leavening agent in the absence of commercial yeast to give the dough an excellent rise. The fermentation process enables sourdough to have its characteristic flavor profile: tangy, slightly sour, and all at once. It also helps create the texture of the chewy inside and crispy outside of the bread, which makes it one of the favorite choices for true bread artisans.
Ingredients
Here’s a simple ingredient list for making a basic sourdough loaf without Dutch oven:
- Sourdough starter (100% hydration) – 100 grams (about 1/2 cup)
- Flour – 500 grams (about 4 cups) of bread flour or a mixture of all-purpose and whole wheat flour
- Water – 350 grams (about 1 1/2 cups)
- Salt – 10 grams (about 2 teaspoons)
Your bread is going to taste as good as it is going to feel and look as well as the quality of your ingredients. Try to find the best flour you can along with filtered water if possible.
Step-by-Step Guide
Take a walk through making sourdough bread from feeding your starter to baking your loaf with out a Dutch oven.
1. Feed Your Sourdough Starter
First of all, let’s make sure our sourdough starter is active and frothy. If it’s been kept in the fridge, we’ll need to feed it a day or two before for it to get going. A quick reminder on how to feed your starter:
- Take your starter out of the fridge; discard half of it, or you can use it in another recipe.
- Allow the rest of the starter to feed with equal weights of flour and water
- Let it rest at room temperature for a few hours, overnight until it becomes bubbly and active
A happy starter is the foundation for a successful loaf of sourdough bread.
2. Mix the Dough
Once your starter is ready, it is time to mix the dough. In a large mixing bowl, combine:
- 100 grams of active sourdough starter
- 350 gr l/w
Mix until the starter dissolved in water. Add the following:
- 500 gr flour
- 10 g salt
Mix the wet ingredients together, until they combine to form a sloppy dough. You shouldn’t need to knead this dough, only until all the flour is hydrated. Get a damp cloth or plastic wrap and cover the bowl for about 30 minutes. This is called **autolyse** and will allow the dough to develop its gluten, eventually making it easier to work with.
3. Do Stretch and Folds
Because kneading can break down much of the gluten developed in autolyse, it is common to first strengthen a sourdough dough with stretch and folds. This nongentle process of build plus develops gluten without doing many of the painful things that occur during kneading. To do it:
- When the autolyse time is almost up, dip your hands lightly in water and reach out and grasp one edge of the dough. Lift it up over the dough and fold it back down over the dough.
- Rotate the bowl one-quarter turn and repeat the stretch and fold. Continue doing this 3-4 times to complete all the sides of the dough
- Cover it and let it rest for 30 minutes.
Repeat the stretch-and-fold steps 3-4 times over 2 hours. This will only increase the gluten, without overworking it; you should notice the dough is become smoother and more elastic after each round.
4. Bulk Fermentation
Time for the bulk fermentation. Covered the bowl and let the dough ferment at room temperature for about 4-6 hours. It should have doubled in size, be visibly bubbly, and feel spongy to the touch.
The length of time of this fermentation would depend on your own kitchen temperature; in a cooler environment, it could take longer, but a warmer room does speed up the process. A well-fermented dough will be light, and if you poke it, the indentation should slowly spring back.
5. Shape the Dough
When the bulk fermentation is complete, it is now time to shape. Turn out the dough gently after lightly flouring your work surface. Do not deflate it too much-this is the component that is responsible for much of the light airy crumb in a well-made bread.
To shape into round boule or oval batard do the following
- Roll the edges of the dough in to bring the edges of the dough over the center with some tension in the skin.
- Turn it over, so that the smooth side goes up, and press it flat into a tight ball using your palms.
- Let the dough rest for 10-15 min. to relax.
Transfer the dough to a lightly floured proofing basket or a bowl covered with a floured kitchen towel, seam-side up.
6. Final Proof
Allow the shaped dough to be under its final proof for another 2-4 hours in room temperature or a long, slow, cold overnight ferment in the refrigerator. A long, slow cold ferment retards the action and produces a deeper flavor, but makes it easier to handle the dough too.
So now, after this process of rising, the dough is ready to be baked. It should be light and airy but still soft. When using your finger to softly press into the dough, it will slowly spring back.

How to Bake Sourdough Without a Dutch Oven
Although a Dutch oven creates steam during baking-that is very much required for the crust to become crisp-you may still make sourdough bread without a Dutch oven: through one of several techniques. Among these, there are some good alternatives listed below:
Method 1: Baking Using a Preheated Baking Stone or Sheet
- Preheat oven to at least 450°F (230°C), for at least 30-45 minutes. Use a baking stone or an upside down baking sheet placed on the middle rack. Preheating oven and stone is important for getting good oven spring. Position a baking sheet or pan containing water on the bottom rack. Steam is created from this water and helps crisp up that golden crust on top.
- Carefully transfer your proofed dough to a piece of parchment paper. Use a sharp knife or razor blade to make some diagonal slits on top of the dough—that way the bread will be able to expand during the baking process.
- Place the dough (on the parchment paper) onto the preheated baking stone or sheet, then shut the oven door right away, in order to retain the steam.
- Steam for 20 minutes; remove the pan with water and bake another 20-25 min. or up to internal temperature of 210 °F (99 °C) while crust is golden brown.
Method 2: Steaming on a Baking Sheet
If you do not have a baking stone, you can use your regular baking sheet. The method is as follows:
- Place a big baking sheet in the oven and preheat the oven to 450°F (230°C). You also place in a pan of water that will create steam during rising.
- Place shaped dough on a piece of parchment paper, score it, and put it in a preheated baking sheet.
- Spray 1/2 cup of water quickly into the hot water pan in the oven. Close that oven door right away.
- Steamy, bake for 20 minutes, then take out the pan of water and bake for a further 20 to 25 minutes.
Method 3: Baking with a Covered Roasting Pan or Aluminum Foil
An excellent technique is to make use of the inverted roasting pan or place the dough under a tent of aluminum foil for the first half of baking. This allows steam to build up inside the pan.
- Preheat to 450°F (230°C). In the oven, place a baking sheet.
- Shape dough into one of the following and put it on parchment paper; transfer dough to hot baking sheet, cover with inverted roasting pan or aluminum foil to create steamy atmosphere.
- Preheat the oven to 225°C. Invert the dough onto a baking sheet and bake for 20 minutes. Remove the top and bake for another 20-25 minutes, or until the crust is golden and crispy.
Cooling and Slicing
Once your bread is done, take it out very carefully and transfer it to a cooling rack for complete cooling. Before slicing, let the bread cool completely. For perfect development of crumb structure, it would need 1-2 hours for getting completely cooled.
Tips:
1. An Active Starter: The sourdough starter should be frothy and active before mixing the dough. This makes the dough to rise and gives a characteristic flavor.
2. Preheat Your Oven: A hot oven and baking surface are very important to achieve a good oven spring and crusty taste.
3. Create Steam: Whether using a pan of water or covering the dough, steam is essential for getting that signature sourdough crust.
4. Don’t Rush the Process: Sourdough is all about timing. Allow the dough to ferment and proof fully for the best results.
Conclusion
Making sourdough bread without a Dutch oven is entirely doable, and the results can be just as impressive. By
